In this post we will talk about Floating Action Button.
Floating action buttons are used for a promoted action. They are distinguished by a circled icon floating above the UI and have motion behaviors that include morphing, launching, and a transferring anchor point.
Floating action buttons come in two sizes:
- Default size: For most use cases
- Mini size: Only used to create visual continuity with other screen elements
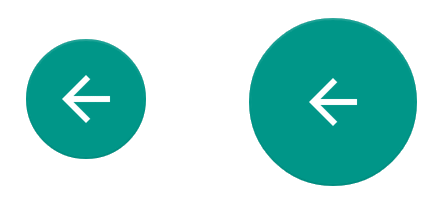
For change size of button need to use fabSize attribute with value: mini or normal.
Firstly need to add library or add dependency for gradle.
dependencies {
    compile 'com.android.support:design:22.2.0'
}
Next step is adding floating action button to layout.
<?xml version="1.0" encoding="utf-8"?>
<RelativeLayout
    xmlns:android="http://schemas.android.com/apk/res/android"
    android:id="@+id/main_content"
    android:layout_width="match_parent"
    android:layout_height="match_parent">

    <android.support.design.widget.FloatingActionButton
        android:id="@+id/fab"
        android:layout_width="wrap_content"
        android:layout_height="wrap_content"
        android:layout_alignParentBottom="true"
        android:layout_alignParentRight="true"
        android:layout_margin="16dp"
        android:src="@drawable/abc_ic_menu_moreoverflow_mtrl_alpha" />
</RelativeLayout>
After it, we need to update Activity.
public class FABActivity
    extends ActionBarActivity
    implements View.OnClickListener {

    @Override
    public void onCreate(Bundle savedInstanceState) {
        super.onCreate(savedInstanceState);
        setContentView(R.layout.fab_layout);

        ((FloatingActionButton)findViewById(R.id.fab)).setOnClickListener(this);
    }

    @Override
    public void onClick(View v) {
        Snackbar
        .make(
            findViewById(R.id.main_content),
            "TEST",
            Snackbar.LENGTH_SHORT
        )
        .show();
    }
}
Unfortunately Snackbar overlaps floating action button.
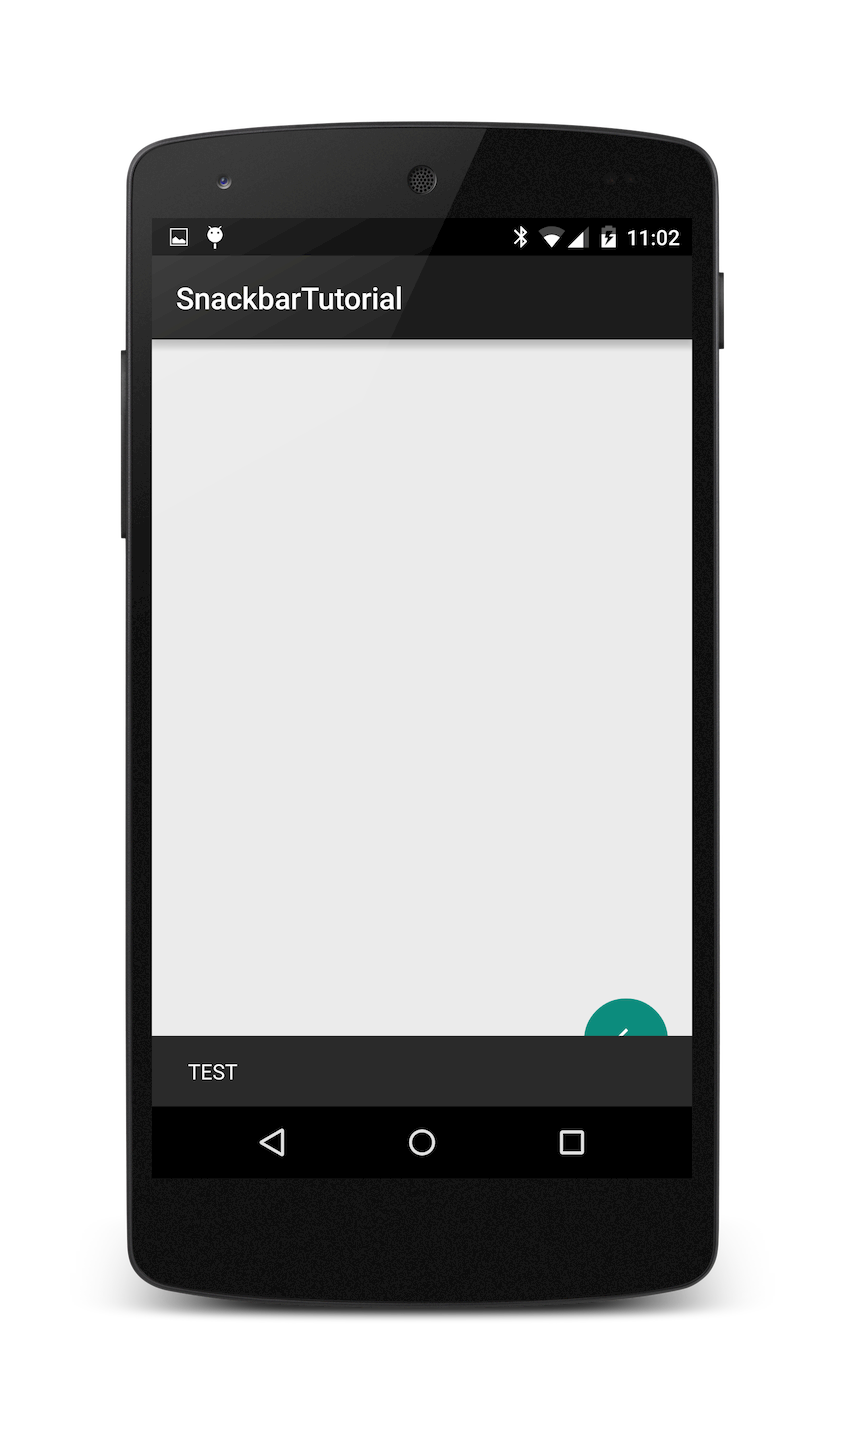
We need to use CoordinatorLayout for fixing this issue.
<?xml version="1.0" encoding="utf-8"?><br />
<RelativeLayout
    xmlns:android="http://schemas.android.com/apk/res/android"
    android:layout_width="match_parent"
    android:layout_height="match_parent">

    <android.support.design.widget.CoordinatorLayout
        android:id="@+id/main_content"
        xmlns:android="http://schemas.android.com/apk/res/android"
        xmlns:app="http://schemas.android.com/apk/res-auto"
        android:layout_width="match_parent"
        android:layout_height="match_parent">

        <android.support.design.widget.FloatingActionButton
            android:id="@+id/fab"
            android:layout_width="wrap_content"
            android:layout_height="wrap_content"
            android:layout_gravity="bottom|right"
            android:layout_margin="16dp"
            android:src="@drawable/abc_ic_menu_moreoverflow_mtrl_alpha"
            app:layout_anchorGravity="bottom|right|end"/>
    </android.support.design.widget.CoordinatorLayout>
</RelativeLayout>
After it all works correctly.
