Runtime Android Permissions were introduced in Android 6.0 (API 23), and starting from then, we could change the state of each permission for the application separately.
I want to propose an analysis of a situation when permission is denied because it is often not tested with UI tests. The majority of UI tests check a case when required permissions are granted. However, it’s important to cover a scenario when permission is denied because some part of application functionality is unavailable, and we don't want to have a crash in this scenario.
We can have the following cases when we speak about runtime permissions:
- all permissions are granted
- some permissions are denied, and we provide information to the user about why we need them
Let's explore different ways of granting and revoking permission in UI test cases.
Interaction with Runtime permissions
We have different ways of interacting with Runtime permission in UI tests:
- using a
GrantPermissionRule - using an ABD command before installing the test application on a device
- interacting with UI element of runtime permission dialog
All these approaches are helpful in different scenarios. Let's check out some other techniques and explore different scenarios when we can apply these approaches.
GrantPermissionRule
A GrantPermissionRule is a JUnit rule which simplifies granting permissions. When permissions are granted, it applies to all tests in the current instrumentation. If you try to revoke permissions, the instrumentation process will crash.
@get:Rule
val permissionRule = GrantPermissionRule.grant(
    android.Manifest.permission.ACCESS_FINE_LOCATION,
    android.Manifest.permission.ACCESS_NETWORK_STATE
)
Let's take a look at a practical example:
class MapNotesTests {

    @get:Rule
    val permissionRule: GrantPermissionRule = GrantPermissionRule.grant(
        android.Manifest.permission.ACCESS_FINE_LOCATION,
        android.Manifest.permission.ACCESS_NETWORK_STATE
    )

    @Test
    fun should_displayMap_when_permissionsAreGranted() {
        ActivityScenario.launch(HomeActivity::class.java)

        onView(withId(R.id.map))
            .check(matches(isDisplayed()))
    }
}
We need to add the following dependency for using the GrantPermissionRule in test cases.
...

dependencies {
    ...
    androidTestImplementation "androidx.test:rules:1.3.0"
}
ADB Commands
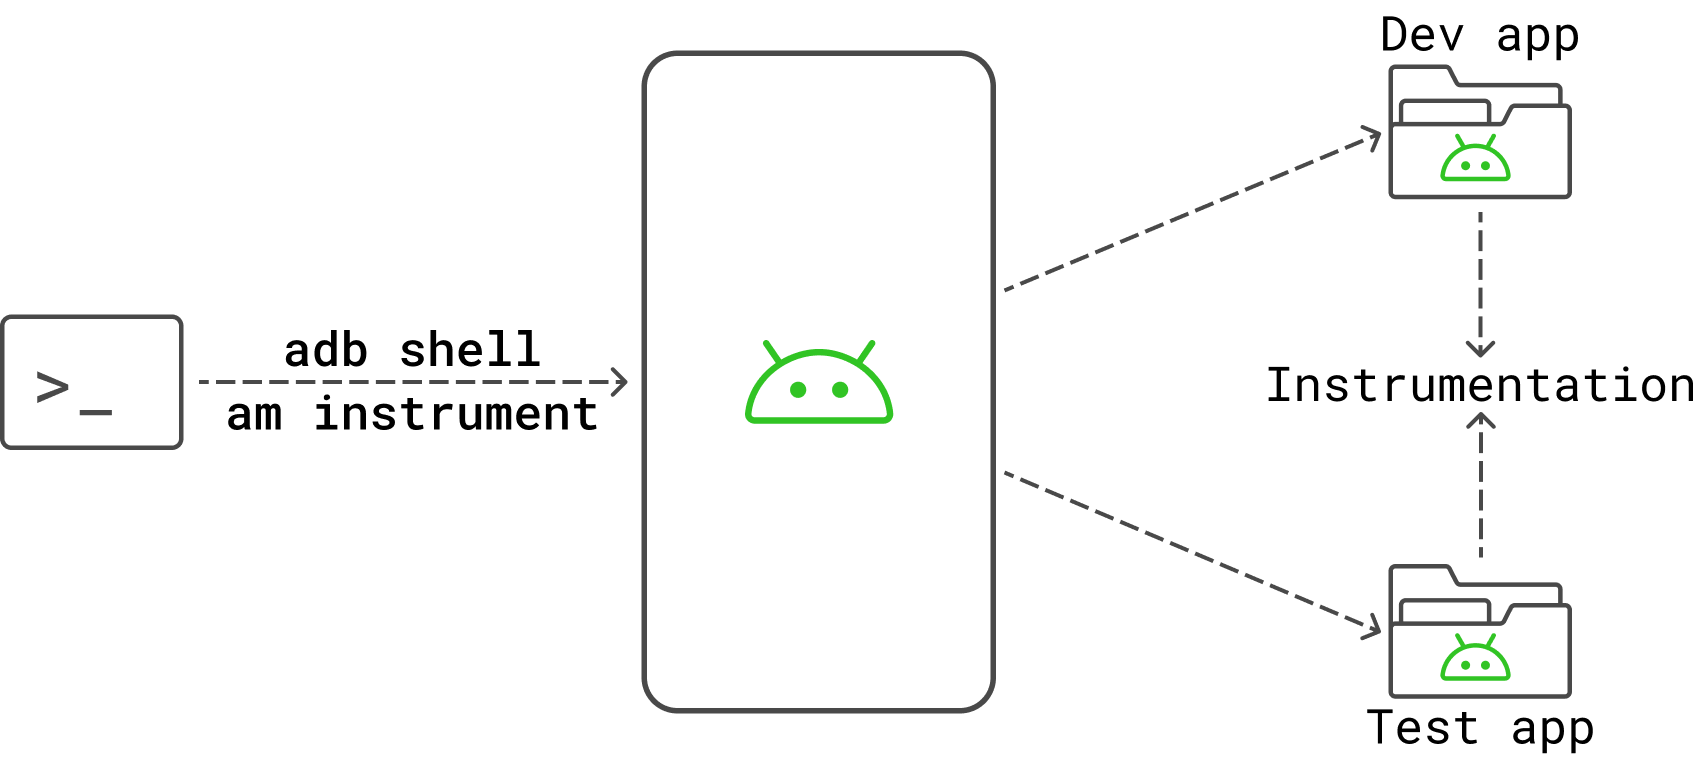
Before running instrumentation tests, two applications will be installed on a device or emulator:
- a debug version of an application
- an application with instrumentation tests
We can grant and remove specific permissions via the ADB (Android Debug Bridge).
We can grant permission(s) with the adb shell pm grant PACKAGE PERMISSION command to grant permission for the package. To revoke permission(s), we can use the adb shell pm revoke PACKAGE PERMISSION command to revoke permission for the package.
So, let's add ACCESS_FINE_LOCATION and ACCESS_COARSE_LOCATION permissions to the application with the com.alexzh.mapnotes package.
adb shell pm grant com.alex.mapnotes android.permission.ACCESS_FINE_LOCATION
adb shell pm grant com.alex.mapnotes android.permission.ACCESS_COARSE_LOCATION
To revoke the ACCESS_FINE_LOCATION and ACCESS_COARSE_LOCATION permissions, we can use the following command.
adb shell pm revoke com.alex.mapnotes android.permission.ACCESS_FINE_LOCATION
adb shell pm revoke com.alex.mapnotes android.permission.ACCESS_COARSE_LOCATION
Finally, we can check which permissions our application has:
adb shell dumpsys package com.alexzh.mapnotes | grep permission
This approach can be helpful when we want to run a set of tests with/without specific permissions.
UI Interaction
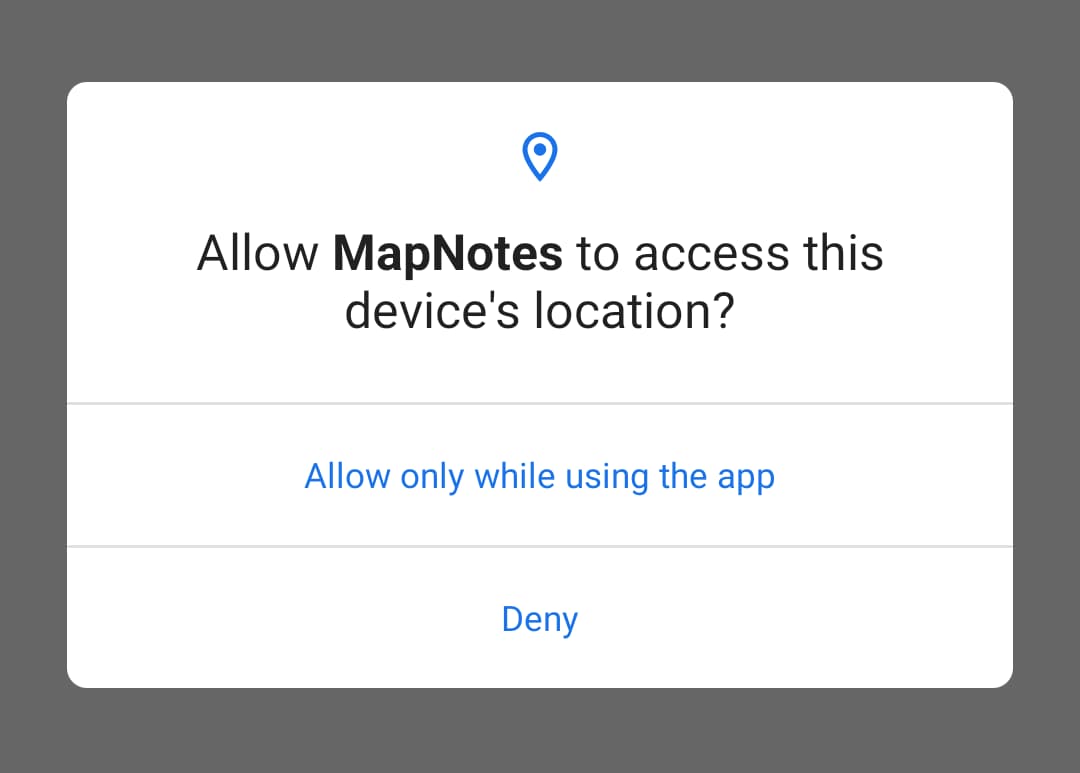
The last approach is to interact with the permission dialog.
Note: We should remember that the permission dialog is not a part of an application; it’s a part of Android OS, meaning that we cannot interact with it using the Espresso framework. We should use a UiAutomator framework (or UiAutomator based framework) to interact with runtime dialog.
Let's analyze the UI of permission dialog in Android Marshmallow (API 23), Android 9 (API 28), Android 10 (API 29) and Android 11 (API 30) versions to understand changes in this dialog during recent releases of Android. We can use UiAutomatorViewer for checking text and index of the "ALLOW" buttons.
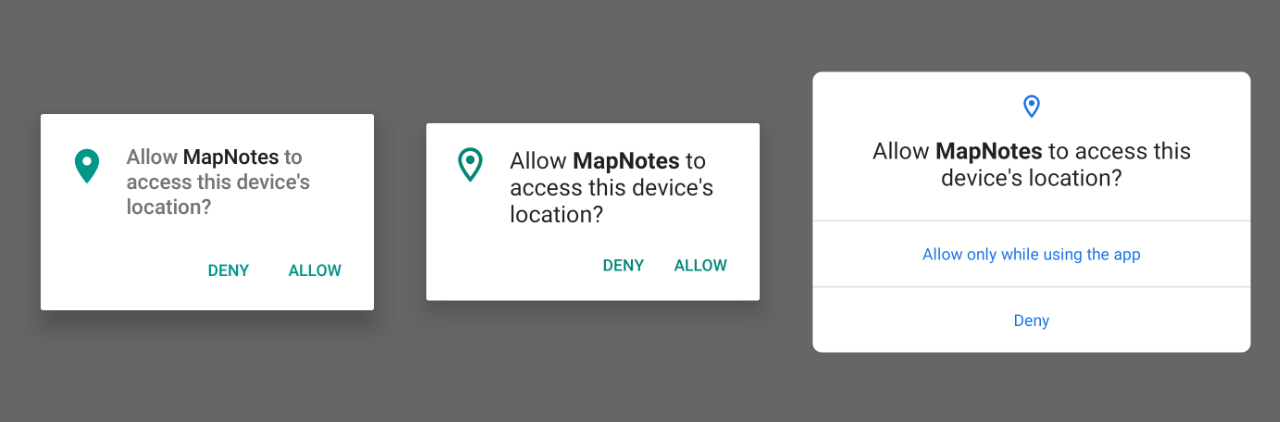
| ALLOW button text | ALLOW button index | |
|---|---|---|
| Android Marshmallow (API 23) | Allow | 2 |
| Android 9 (API 28) | ALLOW | 1 |
| Android 10 (API 29) | Allow only while using the app | 0 |
| Android 11 (API 30) | While using the app | 0 |
As you can see, the index and text of the "ALLOW" are different between devices with API 23 and 28. However, the devices with Android 10+ has the "Allow only while using the app" button. We need to make some adjustments depending on the Android version if we want to make our code workable on different devices/emulators.
Let's create a function for enabling permissions using the UiAutomator framework.
fun grantPermission() {
    val instrumentation = InstrumentationRegistry.getInstrumentation()
    if (Build.VERSION.SDK_INT >= 23) {
    val allowPermission = UiDevice.getInstance(instrumentation).findObject(UiSelector().text(
        when {
            Build.VERSION.SDK_INT == 23 -> "Allow"
            Build.VERSION.SDK_INT <= 28 -> "ALLOW"
            Build.VERSION.SDK_INT == 29 - > "Allow only while using the app"
            else -> "While using the app"
        }
    ))
    if (allowPermission.exists()) {
        allowPermission.click()
    }
}
We can use a similar approach to deny specific permissions when it's needed.
fun denyPermission() {
    val instrumentation = InstrumentationRegistry.getInstrumentation()
    if (Build.VERSION.SDK_INT >= 23) {
        val denyPermission = UiDevice.getInstance(instrumentation).findObject(UiSelector().text(
            when {
                Build.VERSION.SDK_INT in 24..28 -> "DENY"
                else -> "Deny"
            }
        ))
        if (denyPermission.exists()) {
            denyPermission.click()
        }
    }
}
Clean permissions
We explored different approaches to granting permissions, but sometimes we want to deny permission for a specific test even if previous test cases’ permissions were already granted. We can do this with the "Android Test Orchestrator".
We need to add changes to the build.gradle file:
android {
  defaultConfig {
   ...
   testInstrumentationRunnerArguments clearPackageData: 'true'
 }

  testOptions {
    execution 'ANDROIDX_TEST_ORCHESTRATOR'
  }
}

dependencies {
  androidTestUtil 'androidx.test:orchestrator:1.1.0'
}
The clearPackageData: 'true' helps us clear memory and CPU data for our application. This means that we can clear permission before each test case.
Combine approaches
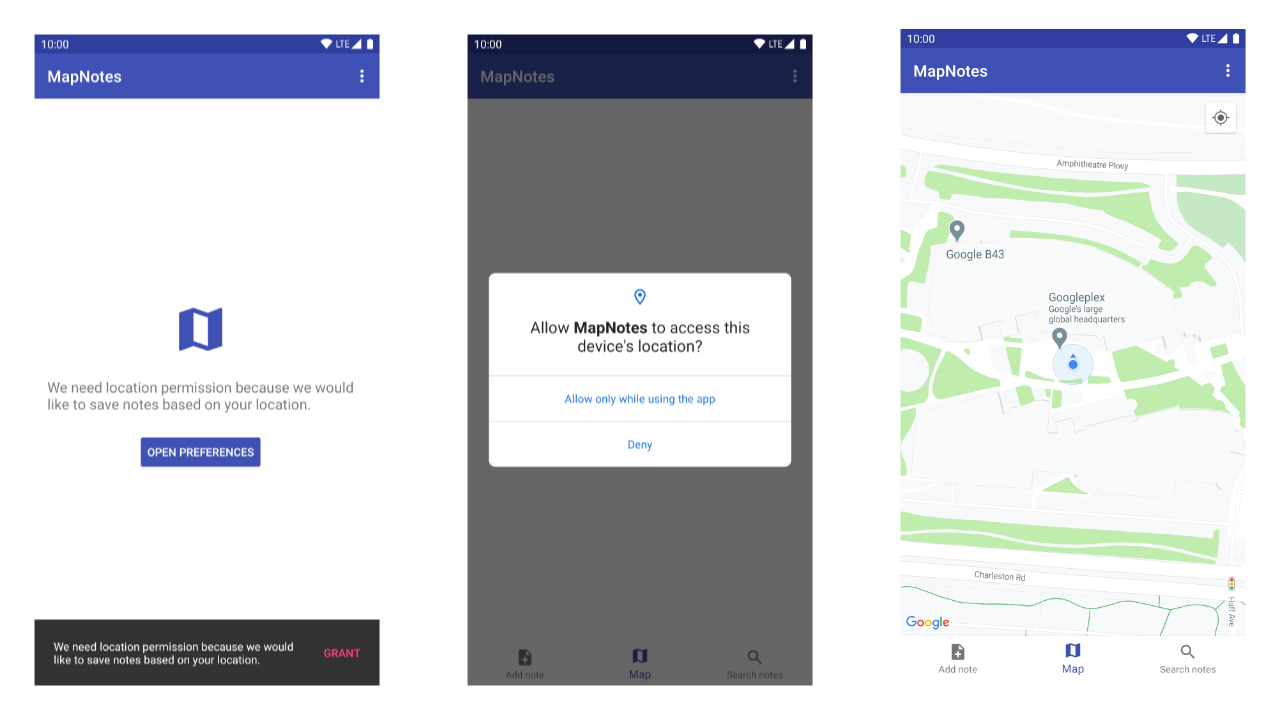
Let's check out two different scenarios:
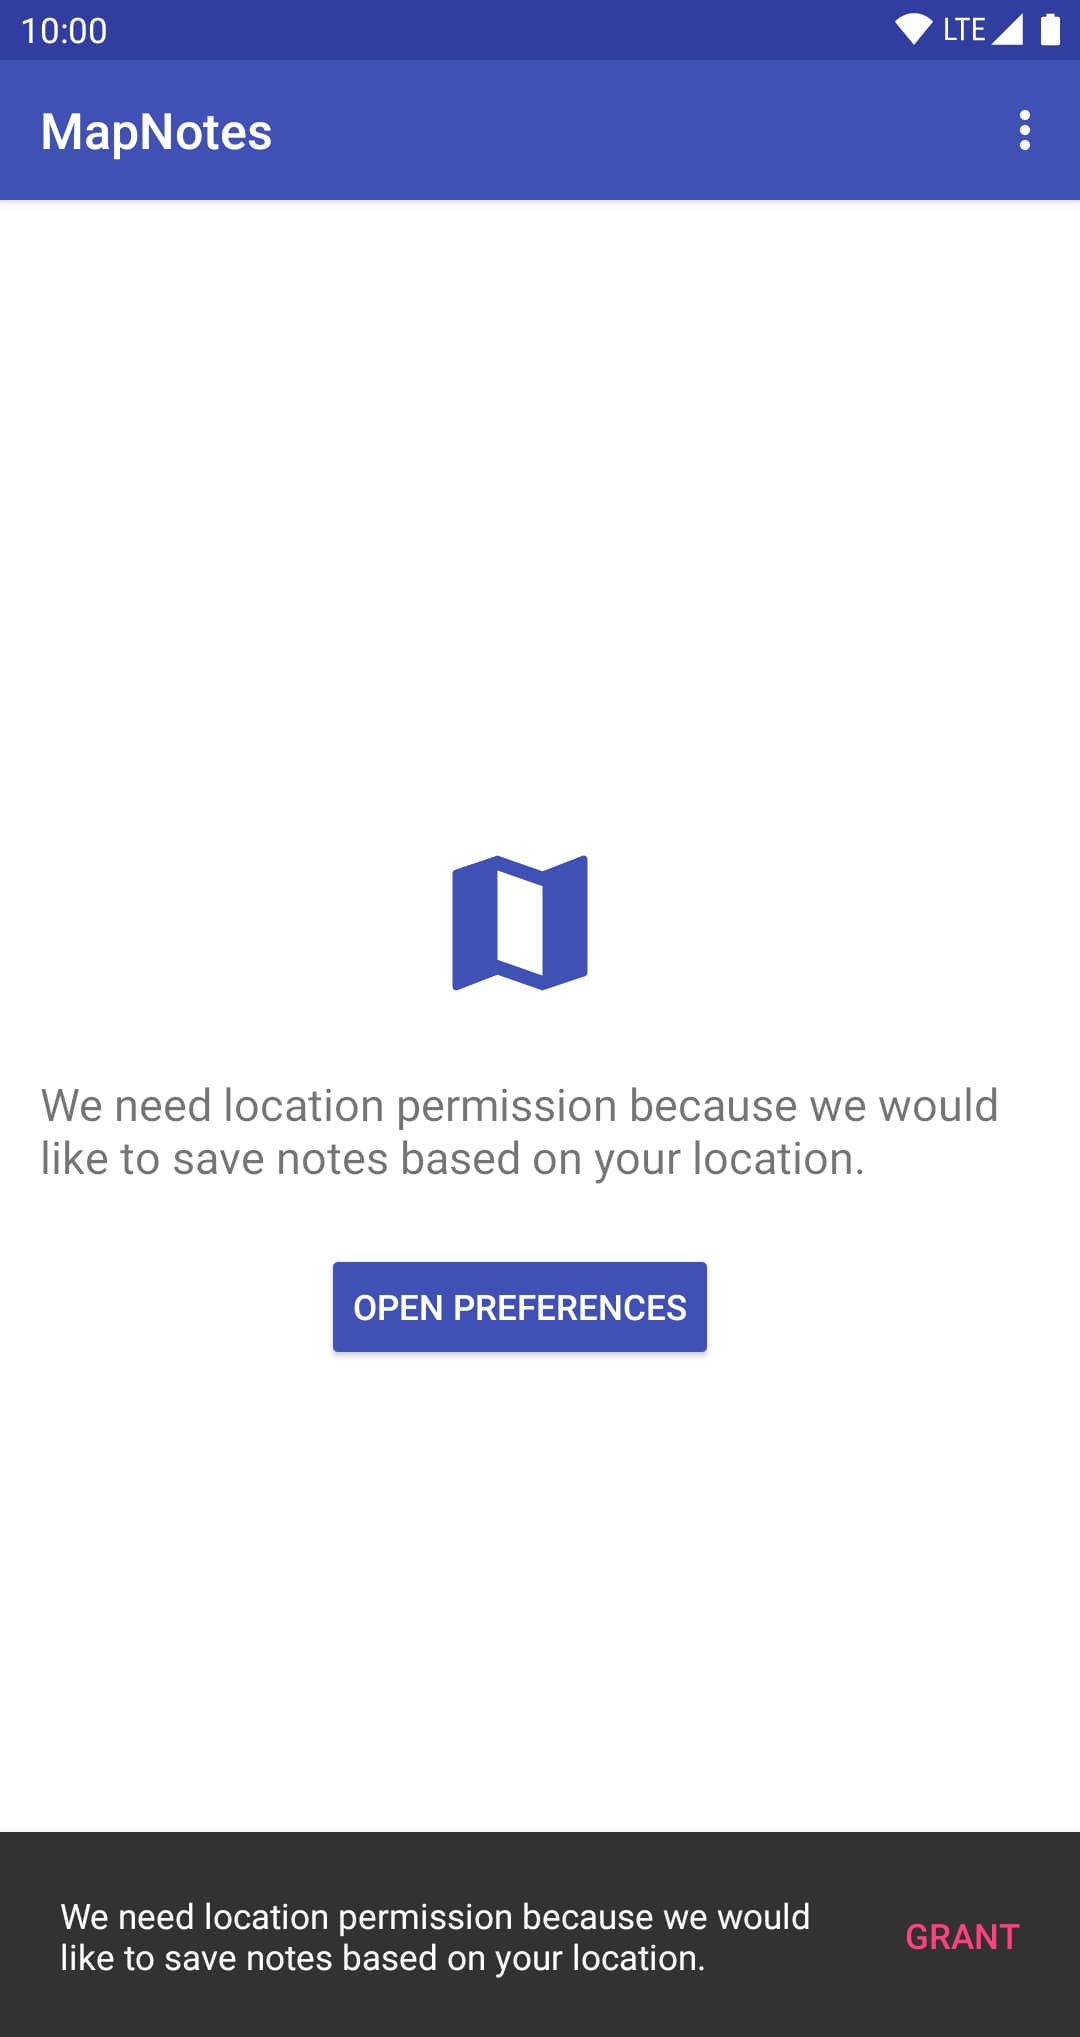
- ACCESS_FINE_LOCATION and ACCESS_COARSE_LOCATION permissions were granted, and map is displayed
- ACCESS_FINE_LOCATION and ACCESS_COARSE_LOCATION permission were denied, and the "No Location permission" screen is displayed
The MapNotesTests class has two cover both of these test cases:
@RunWith(AndroidJUnit4::class)
class MapNotesTests {

    @Test
    fun should_displayMap_when_permissionsAreGranted() {
        ActivityScenario.launch(HomeActivity::class.java)

        grantPermission()

        onView(withId(R.id.map))
            .check(matches(isDisplayed()))
    }

    @Test
    fun should_displayNoPermission_when_permissionsAreDenied() {
        ActivityScenario.launch(HomeActivity::class.java)

        denyPermission()

        onView(withId(R.id.permissionExplanation))
                .check(matches(withText(R.string.permission_explanation)))
    }
}
In this case, we can grant and deny permission by interacting with UI elements of "Permission Dialog."
Note: We need to remember to configure "Android Test Orchestrator" for cleaning application data. However, in this case, the execution time will increase.
Summary
As a result, we can check how our application works with/without permission(s). In addition to this, we can verify what a user sees when permission isn't granted and how a user can grant it.
The Android Test Orchestrator allows us to clear all permissions before each test case.
The UiAutomator or UiAutomator based framework allows us to interact with the Runtime Permission dialog via UI.
The GrantPermissionRule allows us to grant permission to instrumentation.
The ADB commands allow us to grant and revoke permission(s) before executing UI test cases.
We can verify interaction with permission dialogs if we combine UI interacting with the Runtime Permission Dialog, GrantPermissionRule, and Android Test Orchestrator library.