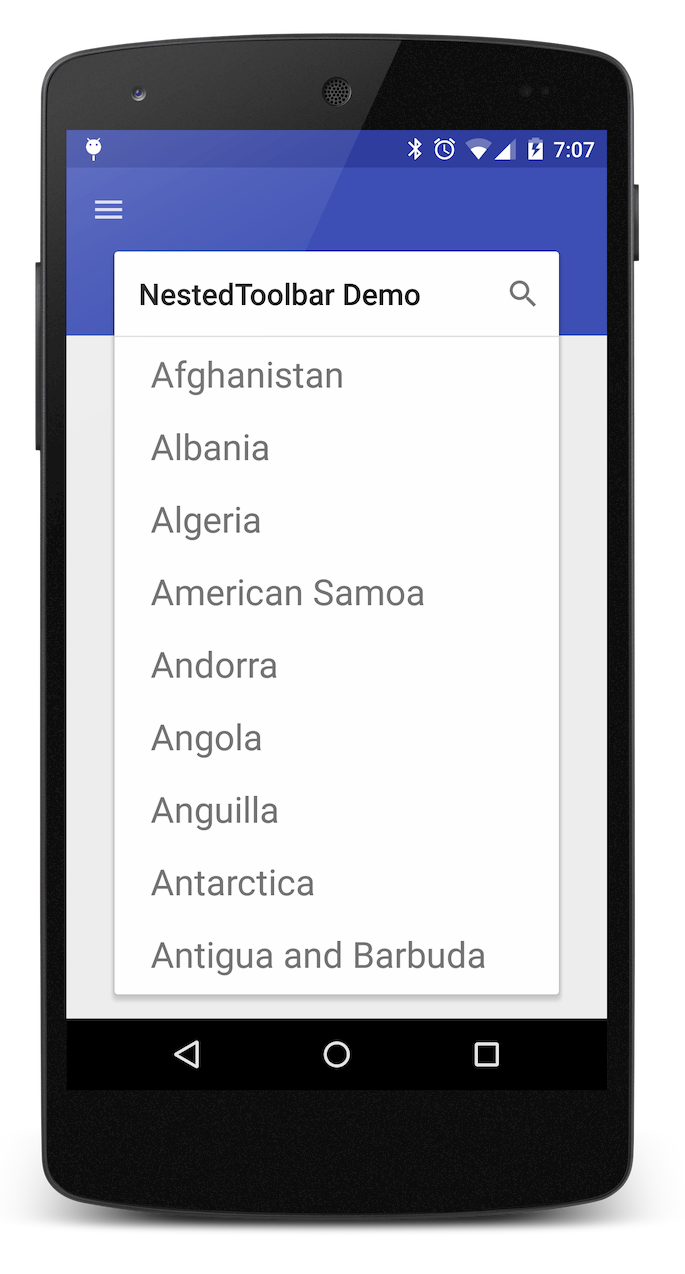
Today, I'm talking about card toolbar or nested toolbar.
A Toolbar is a generalization of action bars for use within application layouts. While an action bar is traditionally part of an Activity's opaque window decor controlled by the framework, a Toolbar may be placed at any arbitrary level of nesting within a view hierarchy.
STEP 1: Add libraries to the project
Need to add some dependences to build.grade file in the project.
dependencies {
    compile fileTree(dir: ‘libs’, include: [‘*.jar’])
    compile ‘com.android.support:appcompat-v7:22.2.0’
    compile ‘com.android.support:cardview-v7:22.2.0’
    compile ‘com.android.support:recyclerview-v7:22.2.0’
    compile ‘com.android.support:design:22.2.0’
}
STEP 2: Add colors, string and dimensions
We need to create colors.xml file in res/values folder for adding file with all colors of the project.
<resources>
    <color name="primaryColor">#3F51B5</color>
    <color name="primaryColorDark">#303F9F</color>
</resources>
We can store all strings in the strings.xml file in res/values folder.
<resources><br />
    <string name="app_name">NestedToolbar Demo</string><br />
    <string name="action_search">Search</string><br />
</resources><br />
We need to create the dimens.xml file in res/values folder for adding dimensions to the project.
<resources>
    <dimen name="activity_horizontal_margin">16dp</dimen>
    <dimen name="activity_vertical_margin">16dp</dimen>
    <dimen name="toolbar_double_height">112dp</dimen>
    <dimen name="cardview_toolbar_spacer">32dp</dimen>
</resources>
You can create different file with colors, dimensions, etc. For difference screens, orientation, etc for it need to create different folder, like values-land for colors, dimensions, etc.
STEP 3: Update main layout
Next step is update layout for the MainActivity.
<FrameLayout xmlns:android="http://schemas.android.com/apk/res/android"
    xmlns:app="http://schemas.android.com/apk/res-auto"
    android:layout_width="match_parent"
    android:layout_height="match_parent"
    android:background="@color/background_material_light" >

    <android.support.v7.widget.Toolbar
        android:id="@+id/generalToolbar"
        android:layout_width="match_parent"
        android:layout_height="@dimen/toolbar_double_height"
        android:background="?attr/colorPrimary" />
    <android.support.v7.widget.CardView
        android:layout_width="match_parent"
        android:layout_height="match_parent"
        android:layout_marginLeft="@dimen/cardview_toolbar_spacer"
        android:layout_marginRight="@dimen/cardview_toolbar_spacer"
        android:layout_marginBottom="16dp"
        android:layout_marginTop="?attr/actionBarSize"
        app:cardBackgroundColor="@android:color/white"
        app:cardElevation="4dp">

        <LinearLayout
            android:layout_width="match_parent"
            android:layout_height="match_parent"
            android:orientation="vertical">

            <android.support.v7.widget.Toolbar
                android:id="@+id/nestedToolbar"
                android:layout_width="match_parent"
                android:layout_height="?attr/actionBarSize" />
            <View
                android:layout_width="match_parent"
                android:layout_height="1dp"
                android:alpha="0.12"
                android:background="@android:color/black" />
            <FrameLayout
                android:id="@+id/content_frame"
                android:layout_width="match_parent"
                android:layout_height="match_parent" />
        </LinearLayout>
    </android.support.v7.widget.CardView>
</FrameLayout>
STEP 4: Add a menu
Need to add a file with a menu to the project. In my case this file called menu_main.xml in res/menu folder.
<menu xmlns:android="http://schemas.android.com/apk/res/android"
    xmlns:app="http://schemas.android.com/apk/res-auto"
    xmlns:tools="http://schemas.android.com/tools"
    tools:context=".MainActivity">

    <item
        android:id="@+id/action_search"
        android:orderInCategory="100"
        android:title="@string/action_search"
        app:showAsAction="always"
        app:actionViewClass="android.support.v7.widget.SearchView"/>
</menu>
STEP 5: Update MainActivity
After it need to update main activity.
public class MainActivity extends AppCompatActivity {
    private Toolbar mNestedToolbar, mGeneralToolbar;

    @Override
    protected void onCreate(Bundle savedInstanceState) {
        super.onCreate(savedInstanceState);
        setContentView(R.layout.activity_main);

        mNestedToolbar = (Toolbar) findViewById(R.id.nestedToolbar);
        mGeneralToolbar = (Toolbar) findViewById(R.id.generalToolbar);

        mGeneralToolbar.setNavigationIcon(R.drawable.ic_action_menu);
        setSupportActionBar(mNestedToolbar);
    }

    @Override
    public boolean onCreateOptionsMenu(Menu menu) {
        getMenuInflater().inflate(R.menu.menu_main, menu);

        MenuItem searchItem = menu.findItem(R.id.action_search);
        mSearchView = (SearchView) MenuItemCompat.getActionView(searchItem);
        mSearchView.setOnQueryTextListener(this);
        if (searchRequest != null)
        mSearchView.setQuery(searchRequest, true);
        return true;
    }
}
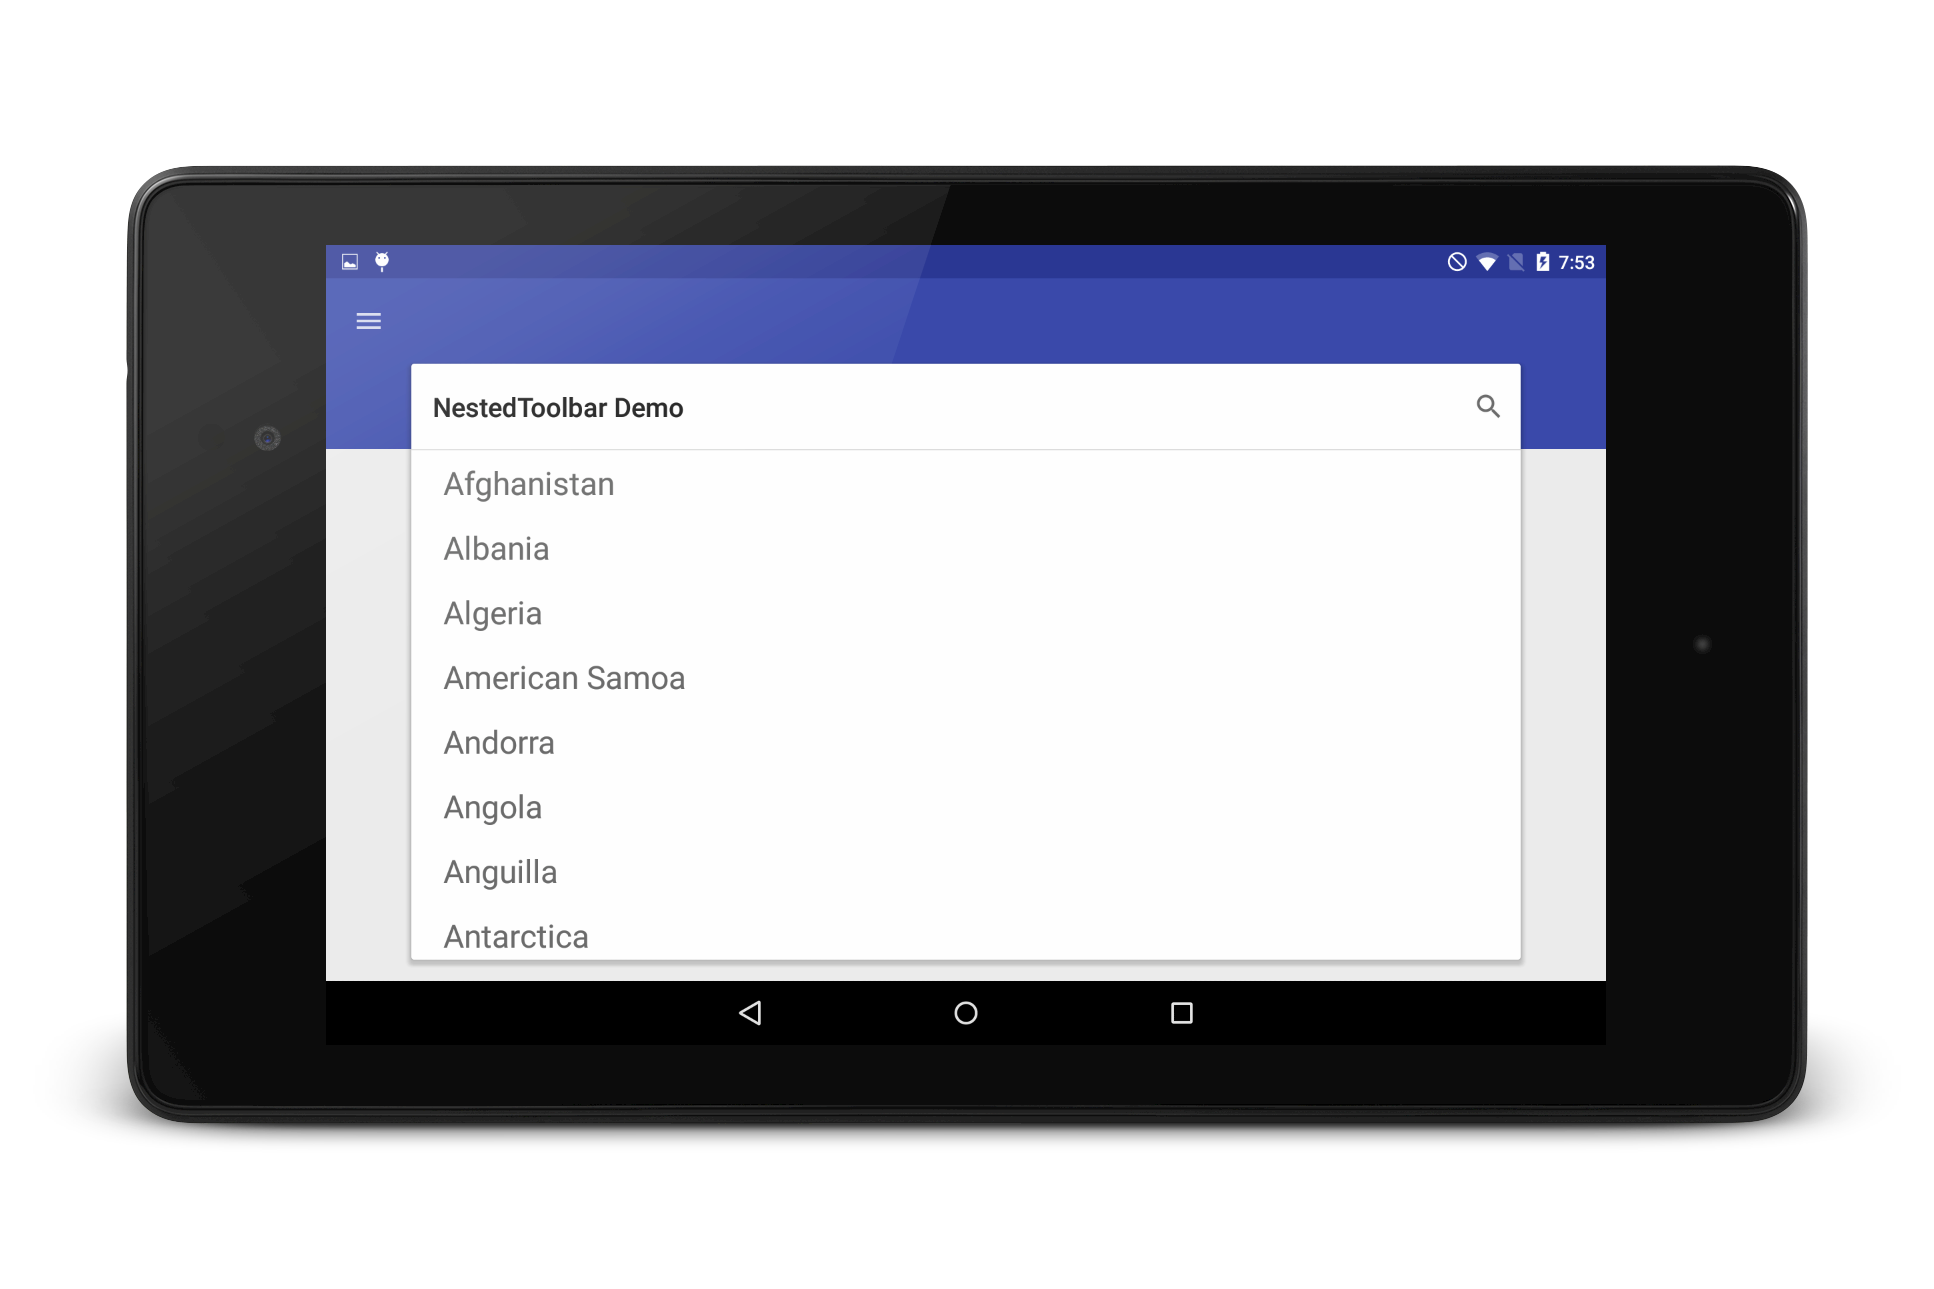
After it you can run application.

I also add more components and content to this project and publish it to GitHub.

